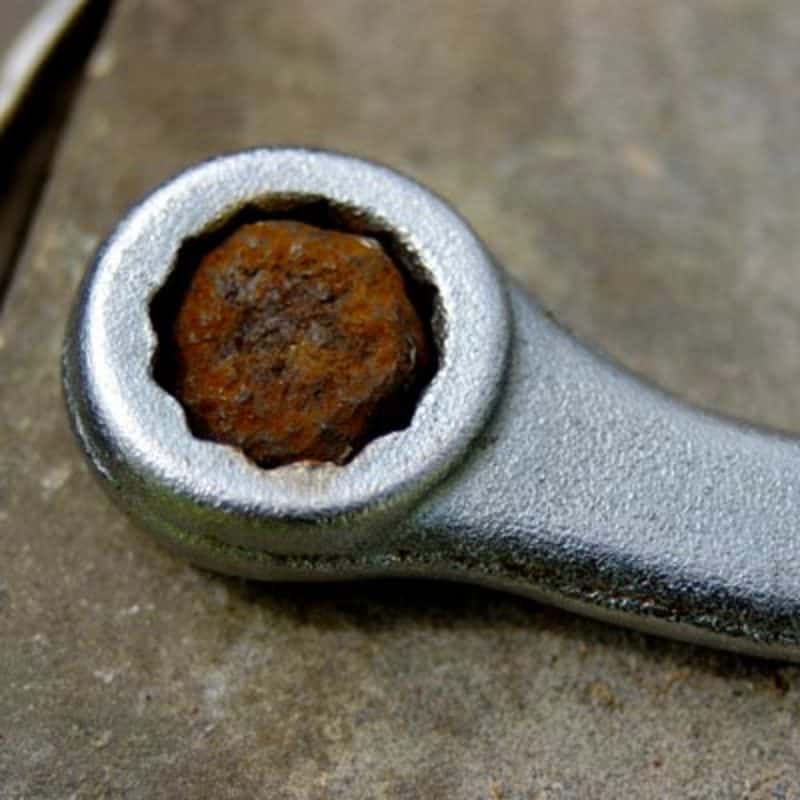
#22 Free a Rusted Nut
(Source: thisoldhouse.com)
Nothing puts a pause on a household project more than a rusted nut. All you will need is a socket wrench to loosen that rusty nut up.
What you need to do:
Tightening it seems counterproductive, but it will liven up the rusted nut.
Tapping it with a hammer will separate the bond between the nut and to what it rusted itself to. Using a nail set will direct the hammer right on its target.
Heat will expand the metal so you will want to aim a hot hair dryer onto the rusted nut and try removing.
Lube the threads of the wrench and clear any excess rust with a wire brush. Rinse and repeat until nut has been successfully removed.
#23 Fix a-Popped Floor Nail
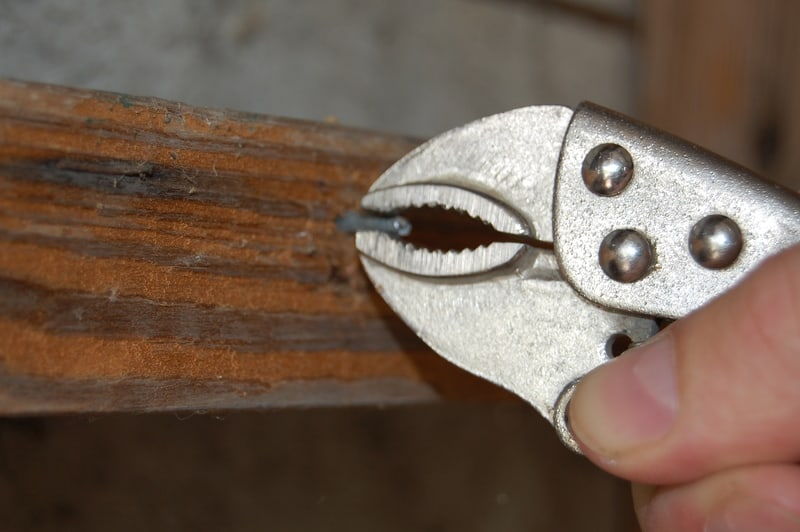
(Source: diyhomeprojectsforeveryhomeowner.com)
Have you ever stumbled into a dark room to discover a popped nail thanks to your barefoot getting caught on it? Ouch. Don’t let this happen to you again or your innocent children, we have a solution for you.
What you need to do:
Get some vise-grips and rock it backward against a block of wood to prevent the nail from denting your floor’s wood. Next, you will want to replace the nail with a trim screw and fill with wood filler.
#24 Hide the Alarm system
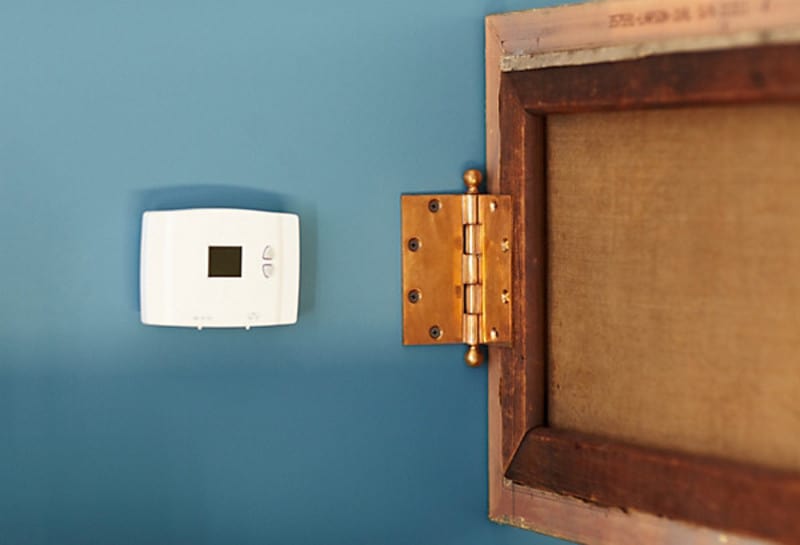
(Source: homedit.com)
A clever way to hide alarms and any other much-needed wall attachment that doesn’t add to your home’s appeal.
What you need to do:
Just hinge up a wall painting that has a hollow backside and use it as a “door” to cover up your thermostat.
#25 Squeegee the Pet Hair from Carpet
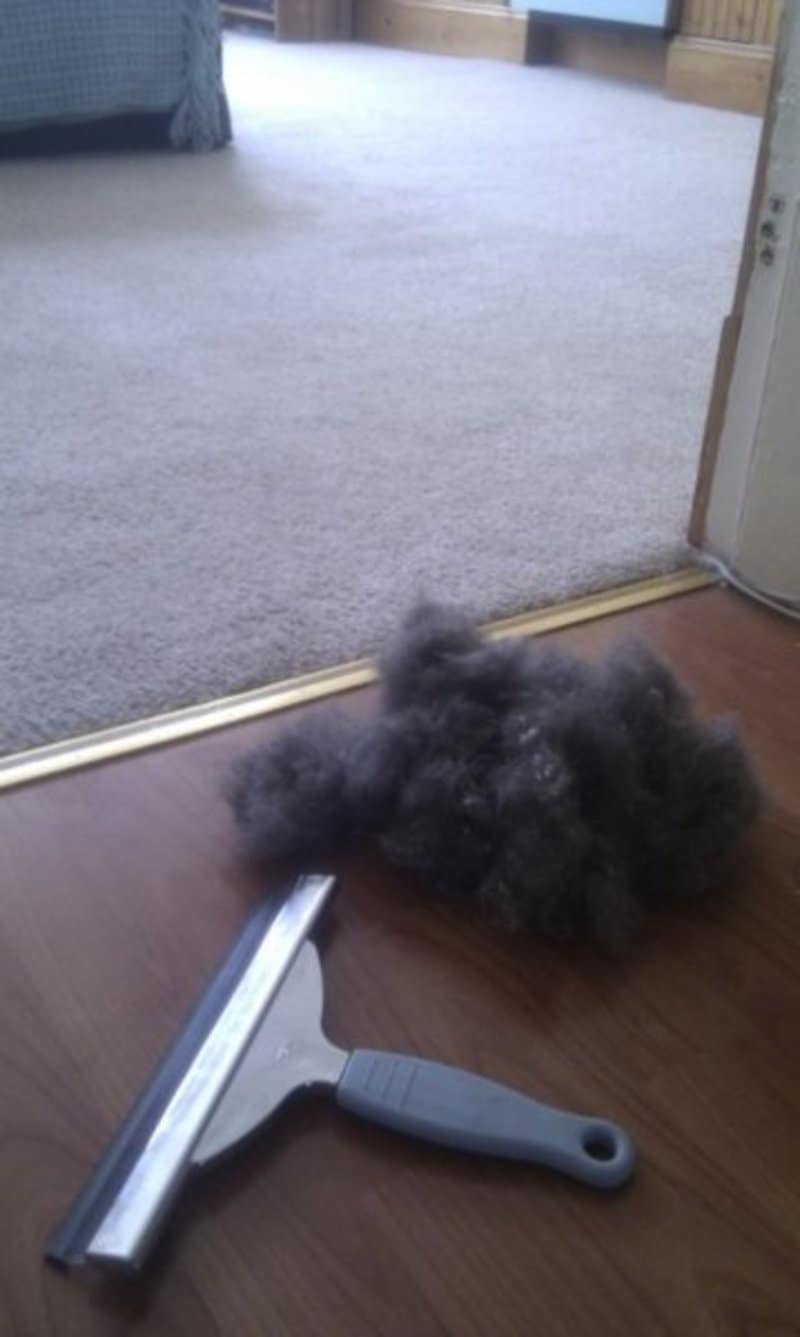
(Soure: reddit.com)
Pet hair is so difficult to vacuum up and there is a simple solution to this hair ordeal.
What you need to do:
Run a squeegee across the carpet floor and watch how easy the hair comes along in each stroke.
#26 Anti-Rug Slippage
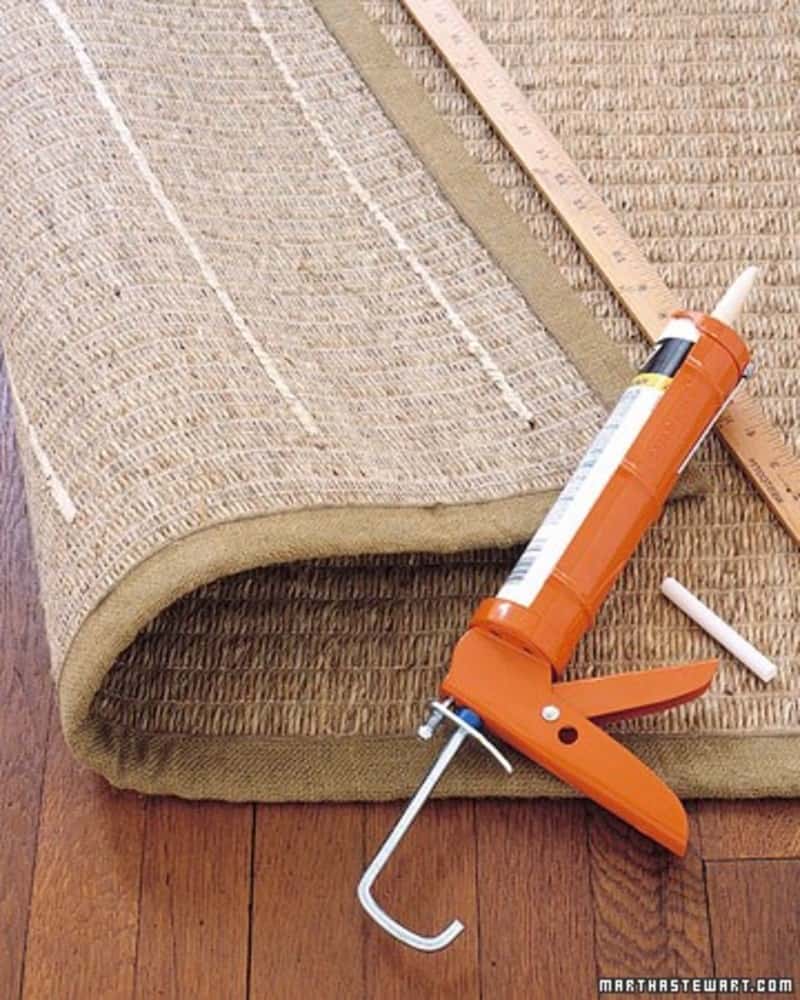
(Source: marthastewart.com)
If you have a rug that keeps slipping around you will know how annoying it is and sometimes dangerous if you’re in a hurry running around in the home.
What you need to do:
Al you need is acrylic-latex caulk on the bottom of the rug to keep it from slipping.
#27 How To Clean Between Oven Glass The Easy Way
We know two-way glass windows helps keep the oven insulated but it is difficult to clean, until now, that is.
What you need to do:
Buy yourself one of these: Hyde Tools 13050 Delta Heavy Duty Glass Scraper with 5 Blades. If you don’t have one, you can get one here on Amazon real cheap.
Be sure to read our first epic series of: 47 actionable DIY home repair tips here
Have a favorite DIY home repair tip to share? Leave a comment, or join our facebook group and tell us about it : )
———-Advertisement———-

Daniel says
As an HVAC professional I recommend against covering the thermostat. Its more than just a control pad. It has a temperature sensor in it that detects the temp of the air in the room its in. Covering it can limit air flow around the T-stat and cause the air in the room to be different from the air around the T-stat behind the cover. That will cause the system to come on/off based on the temp behind the cover regardless of the temp in the room/house.
Mike says
Excellent point of view, Daniel. However, if you’re swinging on a hinge described in the photo, you’re never really restricting the air-flow. A standard door hinge will out-kick 1/4 to 3/8th’s of an inch off of the wall — so we are not really restricting air-flow ( if anything, it’s minuscule). I do entirely agree about the point your trying to get across you’re absolutely right about never completely covering a T-stat.
Sandra Shepard says
What he is saying is that covering it up means that the thermostat will only make the temp behind the picture the temp you want. So when the temp behind the pic reaches 72 the air turns off which will mean the rest of the house will be colder or hotter. It will make your unit run more because it won’t accurately read the room temperature
Scott says
I agree with you. You should not cover the thermostat or impede airflow around it in any way.
Kimberly says
That is alarm
Richard says
Daniel, the “tip” above was for covering a home security key pad not a thermostat, I agree 100% with your explanation for not covering a thermostat.
Raynette Kepa says
Thankyou trying out the food coloring drop right now, waiting 2 hours
Mike says
Awesome. This trick works great for detecting toilette leaks : ) Let me know how it goes.
Raynette Kepa says
Gonna buy Alka seltzer
Mike says
Let me know how it works for you, Raynette. It has been hit or miss with some. This could depend upon how bad the clog is. Worth a shot.
CARLA says
What can you do about squeaky floors that have CARPET?
Mike says
Carla, one option you have, is to take a drywall screw and screw down into the flooring. One or two might do the trick. Try to locate the exact spot and spread the carpeting the best you can and drive a screw into the wood floor.
Judy says
Can I receive these DYI ideas in my email
Mike says
Let me see what I can do, Judy. I might be able to include a printing option at the top of the article.
Sue says
Love your ideas
Mike says
Thank you, Sue.
Ginny says
Any tips of what to do with ceilings after removing the popcorn?
Mike says
You can smooth them out with a drywall sand-block and re-paint them
T.A. Booty says
I’ve never tried this, but read on another DIY site – cover entire room – contents & all – with painters plastic before you start to remove popcorn. ( Makes clean-up a breeze)
Also, to make the ‘popcorn’ release from the wood it’s on – spray a fine mist of water on it & wait a few minutes. The popcorn will peel off with a spachalor or similar tool.
Tiffany says
Any ideas of how to get “white cloudy” stains out of wood furniture? Thanks in advance!
aimee says
What can you do with a particle board dresser sir that’s all scratched up aside from just painting it is there another solution I bought it used and I know I need to sand it
Robin says
Hiding a thermostat behind something is a bad idea the thermostat is there in the open to sensor the air around it really doesn’t matter what it looks like it’s in the open for a purpose and we all have one
Gina says
FYI. You should know that popcorn ceilings can contain asbestos. It is harmless if undisturbed. Before removing it yourself, you should really have it tested to see what it is made up of. Breathing the particles in can cause lung cancer and should only be removed by a professional. That being said, It sure looks like a “neat” way to remove it.
Eric Edwards says
The Vasilene idea is really bad! Better to use a dab of axle grease, won’t dry out like Vasilene will.
Vance says
Please remove tip number 1 regarding removing popcorn ceilings! Especially in older homes, popcorn texture may contain asbestos fibers. Typical shop vacuums, even with HEPA filters, cannot filter out the extremely small fibers of asbestos generated when it is disturbed. The vacuum then blows these fibers out, spreading them throughout the house. Anyone removing popcorn ceiling should have it tested for asbestos prior to beginning work. Removing texture containing asbestos safely requires special equipment and training, and the consequences of improper procedure can be fatal to you or your family members.
connie says
Hints on fixing the edgeing of wood floors. Not just edges of floor but everywhere at some of the corners lufting just enough to be seen
Rhita Taylor says
I use golf tees to fix stripped screw holes. Just apply a little glue on the tee, insert it in the hole, let dry. Cut off the tee flush with the framing and replace the screw.
Rhita Taylor says
Baking soda and vinegar, followed by boiling water works great to unclog a sink drain too.
AnneS says
How much of baking soda per how much of vinegar? What is the ratio of the two ingredients?
Karla says
How can you find out if your popcorn ceiling has asbestos in it? The house was built in 1986.
Mike says
Hi Karla, it’s best you consult with a home inspector to have a sample tested.
Regina carroll says
How can I clean my car seats? They are stained n dirty?
Nichole says
Great information. The coloring in the toilet worked wonders.